When teaching art classes, especially to children, I like to encourage them not to use an eraser. As Bob Ross said so often, “happy accidents” happen a lot in art and “mistakes” can be turned into something else, often improving a picture beyond the original conception. We could talk about the beauty of unplanned discoveries, the surprises found in the creative process…
But sometimes, you just want to start over. Sometimes you need some major changes.
When you spend so much on a high-quality, archival surface, it hurts to waste it, but you can’t make a whole new picture on top of an old one in pastel, right? I mean, of course you can paint over a painting in acrylic or oil, but surely not pastel…it would smear and blend! Or would it? My answer: it depends upon your surface and the thickness of the pastel already applied.
On paper, if the pastel has been applied lightly, you can have a “re-do” without too much trouble, depending on how well the new subject meshes with the old. On papers, the pastel blends and smears a bit more and new layers to not adhere as easily, which can be frustrating. Since paper is more inexpensive than other textured surfaces, it may be your best bet just to start a new piece.
If you use a sanded paper, such as Sennelier La Carte Pastel Card, the textured surface allows you to add a heavier amount of pastel on top of pastel due to the gritty surface that grips the color and prevents as much unwanted smearing/blending. Wallis Paper allows you to gently wash off some of the pastel, and also has a sandy surface to hold more pastel, but you have to be gentle and let it dry thoroughly since it is a type of paper/card.
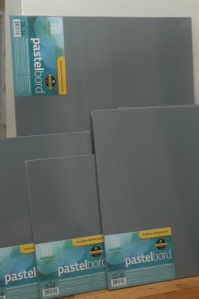
If you use a sturdy, textured Ampersand Pastelbord, you have several options. You can a) wash it off in the sink and let it dry, b)use a kneaded eraser and pull up a lot of the pastel (a good technique for any of the above surfaces), or c) just draw right on top of it, which is what I did with the picture below. I was drawing some sheep on a gray Pastelbord, and just wasn’t “feeling it.” I didn’t want to draw sheep on it anymore, so I “buried” them under a Celtic stone. I had already applied several layers of mostly white and black for the sheep, and had even redrawn the sheep in some different positions, before I began the cross. But, as you can see by the detail picture below, it did not hurt the texture or amount of pastel I applied later.
Celtic Stone, 8×10 Soft Pastel on board
Detail of Celtic Stone
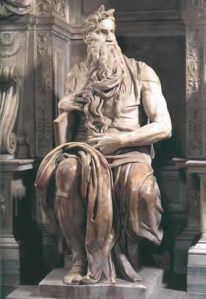
The other night, my husband and I were watching a PBS show “Secrets of the Dead: Michelangelo Revealed.” In the show, they showed how Michelangelo made great alterations to finished marble sculptures, such as the Moses found at the tomb of Pope Julius II. Michelangelo recarved Moses to turn his head in a whole different direction. In stone! If Michelangelo can have a re-do with stone, surely we can in pastel!


